

Oh Berry, Where Tart Thou? LupusChick’s Berry Almond Tart
October 20, 2016
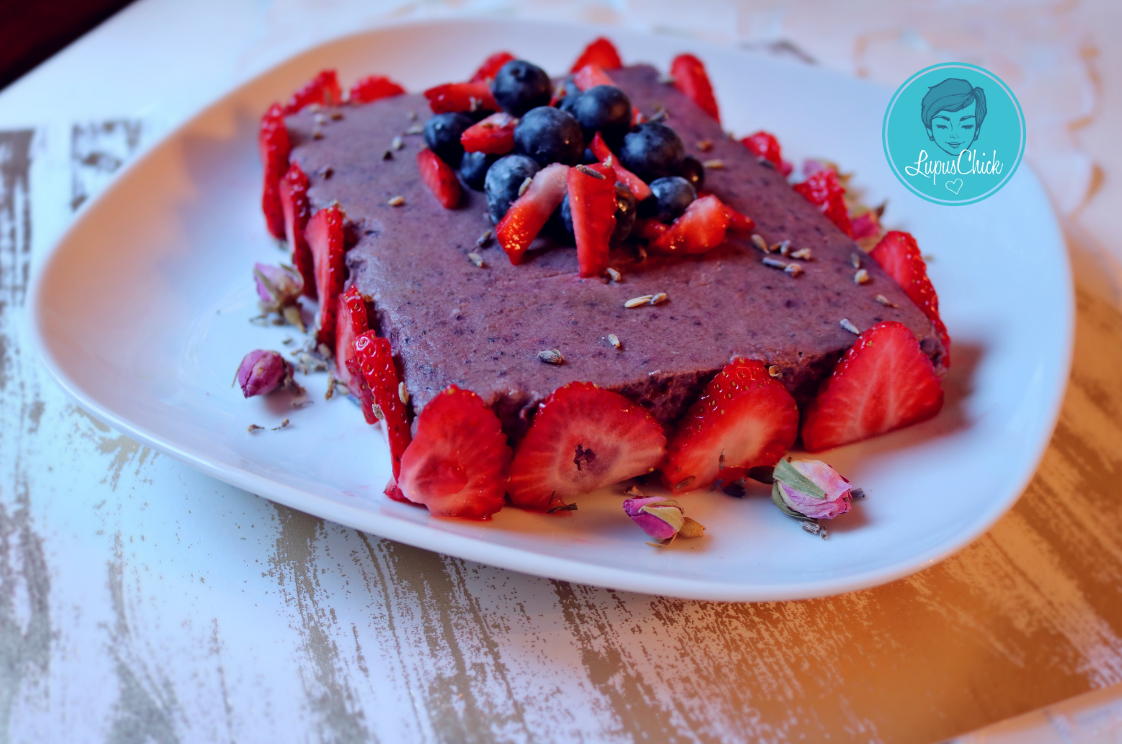
I adore tarts and berries, and wanted to create a no-bake version that is gluten/grain free and tastes incredible. The final outcome, LupusChick's Almond Berry Tart. Made with pure ingredients and with minimal fuss, it is a great "go-to" recipe when you want to impress your family and friends!
Directions
Making the Crust
1Get your cookware prepared by lining and/or spraying your tin or pan with oil to prevent sticking. I used aluminum foil to line my baking dish and coconut oil spray. When the dish was set, it lifted out with no sticking.
2Place raw almonds in your food processor and pulse until chopped well (not too coarse and not fine - somewhere in the middle). Add unsweetened shredded coconut, dates, coconut butter, cinnamon, and salt to the almonds in the food processor. Blend well. Slowly add the honey a little bit at a time and blend until the mixture comes together (meaning it's somewhat sticky enough to form a crust, however you don't want the crust too moist). Transfer the mixture to your pan or dish and spread out evenly. Press down to form a solid crust and put the pan/dish in the refrigerator.
Making the Fruit Layer
1Start your fruit layer by taking the berries you have chosen and putting them in a blender. Add preserves. Puree until smooth. *If your diet allows you to use collagen protein powder, I would add a teaspoon or two into the pureed fruit mixture and mix gently with a spoon until dissolved.
2In a double boiler, melt the coconut butter and coconut oil. Add in the coconut cream and stir until smooth. Remove from heat. Then stir in maple syrup, orange juice and orange zest. Stir until everything is smooth.
3Take your crust out from the refrigerator and gently spoon your fruit mixture on top. Spread evenly and make sure the top is smooth.
4Gently transfer to your freezer for about 30-45 minutes to set.
5Remove from freezer, transfer out of tin or pan, and set on decorative plate or stand.
6Let thaw a few minutes and then get creative! Decorate with edible flowers, berries, coconut shavings, nuts, etc.
7If not serving quickly, store in refrigerator. Most of important, enjoy!
Ingredients
Crust
½ cup unsweetened shredded coconut
2 tablespoons coconut butter, semi-melted
2 heaping teaspoons organic honey
Fruit Layer
1 ½ cups fresh berries, (I had blueberries and raspberries on hand)
½ cup preserves, (ex. raspberry, blackberry, strawberry, blueberry)
½ cup organic coconut cream (I used Native Forest brand)
2 tablespoons real maple syrup
*optional, collagen protein powder if your diet allows
Cookware
6-inch pie tin with removable bottom or a 6-inch square or round baking dish. I used a 6-inch square dish with high sides, lined it with aluminum foil and sprayed with coconut oil spray to prevent sticking.

Be the first to comment